概要
PlayWrightはE2Eテストツールです。ブラウザからの操作を擬似って動作確認をするのに使います。
今回は、素のMacBook Pro、macOS Monterery バージョン 12.2.1 (21D62) にPlayWrightをインストールします。dockerコンテナに入れたかったのですが、コンテナ外のブラウザとやり取りする方法が分からなかったので、直接macOSに入れます。
Homebrewのインストール
パッケージ管理ツールのHomebrewをインストールします。公式サイトはこちら。
サイトによってはrubyを使ってインストールする方法が書かれていますが、公式サイトの通りにcurlでインストールします。
$ /bin/bash -c "$(curl -fsSL https://raw.githubusercontent.com/Homebrew/install/HEAD/install.sh)"sudoのパスワードを聞かれるので、入力します。
Homebrewの動作確認をします。
$ brew doctorWarningが出ますが、開発者向けなので気にしないでいいとの事です。試しにsoftwareupdateしてみても、対象アップデートはありませんでした。エラーが出ていないので先に進みます。
Please note that these warnings are just used to help the Homebrew maintainers
with debugging if you file an issue. If everything you use Homebrew for is
working fine: please don’t worry or file an issue; just ignore this. Thanks!
Nodebrewのインストール
node.jsの環境管理ツールのNodebrewをインストールします。
$ brew install nodebrewNode.jsのインストール
Node.jsの最新版をインストールします。「curl: (23) Failure writing output to destination」というエラーが出るので、先にフォルダを作っておきます。
$ mkdir -p ~/.nodebrew/src$ nodebrew install-binary latestインストールしたnodeのバージョン確認と有効化
nodebrew listでバージョン確認し、そのバージョンを使用します。
$ nodebrew use v17.7.1nodeやnpmにパスを通す
$ echo $SHELLうちのMacはzshでしたので、~/.zshrcにパスを追加して反映します。
$ echo 'export PATH=$PATH:$HOME/.nodebrew/current/bin' >> ~/.zshrc$ source ~/.zshrcPlayWrightのインストール
npmでPlayWrightをインストールします。
$ npm install playwright動作確認
公式ドキュメントの「Getting started」を見ながら、サンプルのテストを実行します。
# create project directory
mkdir -p ~/dev/sample-pj-1
cd ~/dev/sample-pj-1
# Run from your project's root directory
npm init playwright
# Or create a new project
npm init playwright new-project
# test
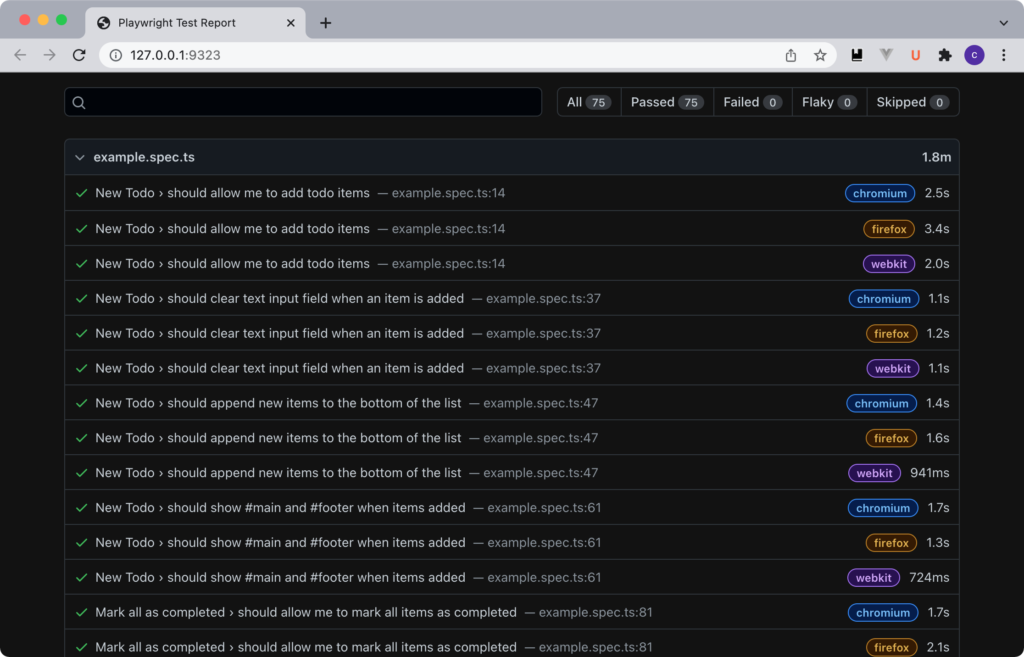
npx playwright test --headed
# show result with browser
npx playwright show-reportテスト結果をブラウザで見る事ができます。